If you love jigsaw puzzles, you know they’re more than just a way to pass the time. Finishing a puzzle can be relaxing, rewarding, and even a little bit addictive. But some puzzles are so beautiful—or so meaningful—that you just can’t bring yourself to take them apart. That’s when framing your puzzle is the perfect solution.
Framing a jigsaw puzzle lets you turn your hard work into a piece of art you can proudly display on your wall. It could be a stunning landscape, a vibrant animal scene, or a puzzle that holds special memories. Whether it’s your first 1,000-piece challenge or a gift from someone special, framing a puzzle is a great way to celebrate your achievement and keep it safe for years to come.
In this article, you’ll learn everything you need to know about how to frame a jigsaw puzzle the easy way—even if you’ve never done it before. We’ll walk you through each step, from choosing the right puzzle to gluing, framing, and hanging it on the wall. Ready to turn your puzzle into a masterpiece? Let’s get started.
1. Choose the Right Puzzle to Frame
Before you start framing, it’s important to choose the right puzzle. Not every puzzle needs to be framed—so pick one that truly means something to you or looks amazing when finished.
Start by thinking about what makes the puzzle special. Maybe it reminds you of a fun vacation, a favorite animal, or a gift from someone you care about. It could also just be a beautiful design or scene that you’d love to see on your wall every day.
Next, consider the size and piece count. A 1,000-piece puzzle is a popular choice because it’s large enough to look impressive but still manageable. However, if you’re framing a smaller or larger puzzle, that’s totally fine too—just make sure you can find a frame that fits.
Finally, think about how the puzzle will look as part of your home decor. Look at the colors, patterns, and overall theme. Will it match the style of the room? Is it bright and fun for a living space, or calm and peaceful for a bedroom or office? Choosing a puzzle that fits your space will help it feel like a natural and beautiful part of your home.
2. Prepare the Puzzle for Framing
2.1. Complete the Puzzle on a Suitable Surface
Before you start putting your puzzle together, make sure you’re working on the right surface. Choosing a flat, stable, and clean area is very important—especially if you plan to frame your puzzle later.
Try to use a surface that is both flat and portable. A smooth table or a large board works great. This helps keep all the pieces aligned and prevents the puzzle from getting bent or damaged. A flat surface also makes it easier to glue or frame your puzzle once it’s finished.
If you don’t have a dedicated table, consider using a puzzle mat or puzzle board. These are specially made for puzzling and often let you roll up or move your puzzle without losing your progress. Puzzle mats are flexible and easy to store, while puzzle boards are sturdy and often come with sorting trays or drawers.
By starting on the right surface, you’ll make the entire process of building, moving, and framing your puzzle much easier and stress-free.
2.2. Clean and Flatten the Puzzle
Once you’ve finished your puzzle, take a few minutes to check that it’s clean and flat before moving on to framing. This step helps your puzzle look its best and stay in good shape for years to come.
First, make sure all the pieces are there. Check that nothing is missing or out of place. Then, gently brush the surface of the puzzle with a soft cloth or clean, dry brush to remove any dust, crumbs, or pet hair that may have settled on it while you were working.
Next, check the edges and surface of the puzzle. Sometimes, puzzle pieces can become a little curled or warped, especially if the puzzle was moved around or exposed to moisture. To flatten it, you can do one of these simple tricks:
- Place heavy books or a flat board on top of the puzzle for a few hours or overnight.
- Put a sheet of wax paper or clean cloth on top, then gently press with a warm (not hot) iron for a few seconds at a time—only if your puzzle is unglued and dry.
By making sure your puzzle is clean and flat, you’ll be setting the stage for a smooth gluing and framing process. It may seem like a small step, but it makes a big difference in how your final framed puzzle looks.
3. Gluing the Puzzle Together (Optional But Recommended)
3.1. Why Glue Your Puzzle?
If you want to keep your finished puzzle forever, gluing it is a smart and simple step. It helps your puzzle stay together, making it much easier to move and frame without any pieces falling apart.
When you glue your puzzle, you’re sealing all the pieces in place, turning it into one solid piece—like a poster or a painting. This means you won’t have to worry about parts coming loose while you lift or frame it.
Gluing also makes the puzzle stronger and easier to handle. You can slide it onto a backing board, place it into a frame, or even hang it on the wall without stressing over shifting pieces.
In short, glue is what helps turn your puzzle from a fun activity into a lasting piece of art you can proudly display in your home.
3.2. What Type of Glue to Use?
When it comes to gluing your puzzle, not all glue is the same. Choosing the right kind of glue can make the process smoother and help your puzzle look neat and clean when it’s done.
The best option is to use puzzle glue, which is made especially for jigsaw puzzles. Puzzle glue dries clear, spreads evenly, and holds the pieces together without causing damage. You can find it at craft stores or online. It’s designed to stick well and give your puzzle a shiny, smooth finish.
You might wonder if you can just use regular glue, like school glue or white craft glue. While it’s possible, it’s not always the best choice. Regular glue can be too thick or too watery, which might cause the puzzle to wrinkle, warp, or dry unevenly. If you do use regular glue, make sure to test it first on a small corner of the puzzle.
There are also two types of puzzle glue to choose from: liquid glue and spray glue.
- Liquid glue is more common. You pour it over the puzzle and spread it with a sponge or brush. It takes a little more time, but it gives a strong and even finish.
- Spray glue is faster and easier to apply, but it might not hold as firmly, especially for thicker or larger puzzles.
No matter which glue you choose, make sure to read the instructions on the bottle and give it enough time to dry before moving on to the next step.
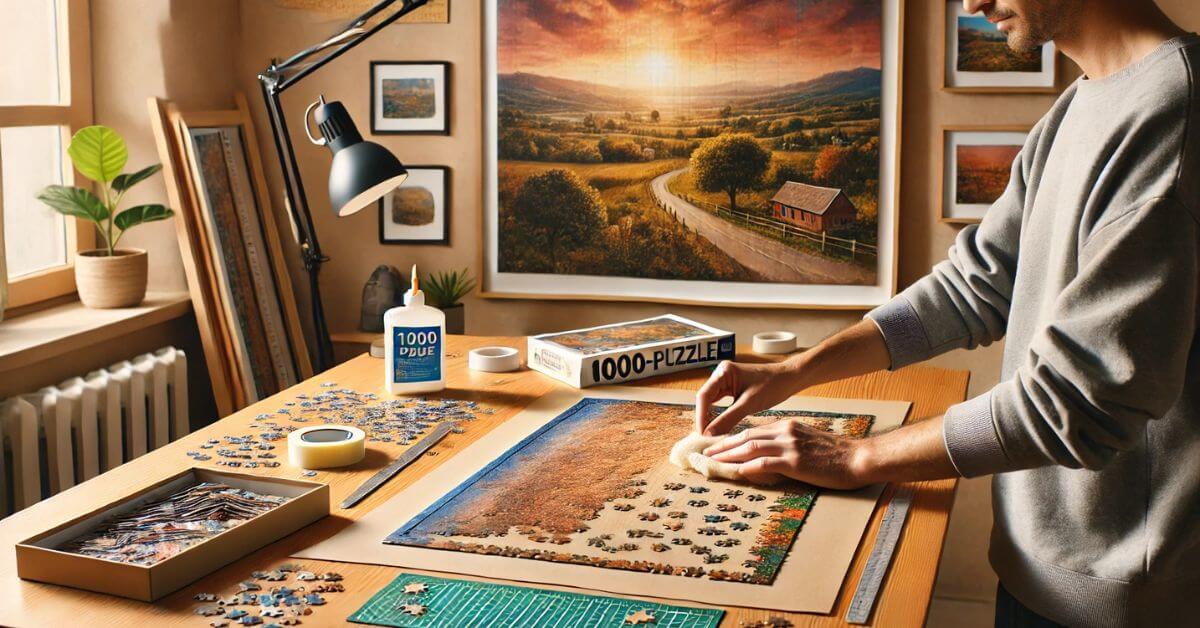
3.3. How to Apply Puzzle Glue
Gluing your puzzle is easier than you might think. Just follow these simple steps, and you’ll have a smooth, strong puzzle ready to frame in no time.
Step 1: Place Wax Paper Under Your Puzzle
Before you start gluing, carefully slide a sheet of wax paper or plastic wrap under your finished puzzle. This protects the surface below and keeps the puzzle from sticking to your table or board.
Step 2: Pour Glue on the Puzzle Surface
Next, gently pour a small amount of puzzle glue right onto the center of your puzzle. Don’t use too much at once—it’s better to add more little by little as you go.
Step 3: Spread the Glue Evenly
Use a sponge, brush, or plastic spreader (often included with puzzle glue) to carefully spread the glue across the entire surface. Make sure to cover all the pieces, including the edges. You want the glue to go slightly between the cracks so it holds the puzzle together.
Step 4: Let It Dry Completely
After you’ve covered the whole puzzle with glue, leave it undisturbed to dry. This usually takes 1 to 2 hours, but some glues may take longer. Check the bottle for drying time, and don’t try to move the puzzle until it’s fully dry and firm.
Once the glue has dried, your puzzle will be one solid piece—smooth, shiny, and ready to frame!
4. Choosing a Frame
4.1. Measure Your Puzzle
Before you can buy a frame, you need to measure your puzzle carefully. Getting the right size is very important—if the frame is too small, the puzzle won’t fit. If it’s too big, the puzzle might slide around or look uneven.
Use a ruler or measuring tape to measure the height and width of your finished puzzle. You can measure in inches or centimeters, depending on the frame options available to you. Be sure to measure from edge to edge, including any small borders or gaps around the puzzle.
Write down the exact measurements and double-check them before shopping for a frame. If your puzzle is an unusual size, you may need to look for a custom frame. Taking the time to measure correctly now will help you avoid frustration later—and make sure your framed puzzle looks perfect on the wall.
4.2. Types of Frames
Once your puzzle is complete and ready to be displayed, it’s time to choose the right frame. There are several types to consider, and picking the best one depends on your puzzle’s size, style, and where you plan to hang it.
Custom Frames vs. Ready-Made Frames
If your puzzle is an unusual size or you want a perfect fit, a custom frame might be the best choice. These are made to match your puzzle’s exact measurements, so there’s no extra space or awkward gaps. However, custom frames can be more expensive and take longer to get.
Ready-made frames, on the other hand, are cheaper and easier to find in stores or online. They come in standard sizes, so if your puzzle matches one of those, this is a quick and simple option.
Shadow Box Frames vs. Regular Picture Frames
A shadow box frame is deeper than a regular frame. It’s great if your puzzle is thick or if you want to add extra items, like the puzzle box cover or special decorations. It also adds a bit of depth and style to your display.
A regular picture frame is flatter and works well for glued puzzles that don’t need much space. It gives a clean and classic look and is perfect for most standard puzzles.
Frame With or Without Glass
Some frames come with glass or clear plastic covers, while others are open. A glass-covered frame protects your puzzle from dust, scratches, and fading, but it can reflect light and cause glare. If you choose a glass frame, try to hang it somewhere that doesn’t get direct sunlight.
A frame without glass gives a more natural look and avoids reflections, but your puzzle will be more exposed. If you go this route, make sure your puzzle is glued securely and hang it in a low-dust, dry area.
Choosing the right frame helps protect your puzzle and makes it look even more impressive on your wall.
4.3. Matching Frame Style to Puzzle Design
When choosing a frame, it’s not just about size—it’s also about style. The right frame can make your puzzle look even better and help it blend in with your home decor. Think of the frame like a border that completes the picture.
Start by looking at the colors and theme of your puzzle. Is it bright and playful? Calm and peaceful? Dark and dramatic? This can help you choose a frame that matches or enhances the overall look.
- Wooden frames are great for nature scenes, animals, or puzzles with warm colors. They give a classic and cozy feel.
- Black frames add a bold, modern touch and work well with puzzles that have strong contrast or lots of detail.
- White frames are clean and simple. They’re perfect for colorful or light-toned puzzles and help make the artwork stand out.
- Colorful frames can be fun if you want to match a specific color in the puzzle or add a playful vibe—great for puzzles with cartoon or fantasy designs.
Your goal is to choose a frame that complements your puzzle art, not distracts from it. Hold up different frame colors next to your puzzle before deciding. The right frame will make your finished puzzle look like a real piece of art, ready to hang and enjoy every day.
5. Mounting the Puzzle in the Frame
5.1. Use a Backing Board
Before placing your puzzle into a frame, it’s important to give it solid support. That’s where a backing board comes in. It helps keep your puzzle flat, secure, and protected while it’s in the frame.
You can use a few different types of backing materials, such as foam boards, cardboard, or even the backing that comes with the frame. Foam boards are a popular choice because they’re lightweight, sturdy, and easy to cut to size. Cardboard also works well and is usually easy to find around the house.
The backing board adds an extra layer of protection and support, making sure your puzzle doesn’t bend or shift once it’s framed. Just place the glued puzzle on top of the backing and make sure it fits perfectly before closing the frame.
Using a backing board might seem like a small detail, but it helps keep your puzzle looking great for a long time.
5.2. Securing the Puzzle
Once your puzzle is dry and ready to be framed, the next step is to secure it to the backing board. This helps keep it in place and prevents it from shifting inside the frame.
You can use double-sided tape, adhesive sheets, or a small amount of mounting glue. Double-sided tape is easy to use and mess-free. Adhesive sheets are great for covering larger areas evenly. If you use glue, be careful not to use too much—it should just lightly stick the puzzle to the backing.
Carefully line up your puzzle with the center of the backing board. Then, gently press it down, starting from the middle and working your way out to the edges. This will help avoid any bubbles or raised pieces.
Take your time and handle the puzzle gently to avoid bending or breaking it. Once it’s secured, your puzzle will stay in place and be ready for framing. This step makes a big difference in how neat and polished your final result looks.
5.3. Sealing the Frame
Now that your puzzle is glued and secured to the backing board, it’s time to seal the frame. This final step helps protect your puzzle and gives it a clean, finished look.
If your frame comes with a glass or clear plastic cover, carefully place it over the front of your puzzle. This cover protects your puzzle from dust, moisture, and scratches. It’s optional, but it’s a great way to keep your puzzle looking new for years.
Next, lock the backing into place. Most frames have metal tabs, clips, or fasteners that hold everything together. Make sure the backing is tightly secured so the puzzle doesn’t move or slide around.
Before hanging your puzzle on the wall, take a moment to clean the glass or plastic cover with a soft cloth. This will remove fingerprints or dust and make your puzzle look even better once it’s up.
With the frame sealed and clean, your puzzle is now ready to be displayed and enjoyed!
6. Displaying Your Framed Puzzle
Now that your puzzle is framed, it’s time to hang it up and show it off! Displaying your puzzle is a fun way to enjoy your hard work and add a personal touch to your home.
To hang your framed puzzle safely, you can use nails, picture hooks, or hanging wire. If your frame has built-in hooks or a wire on the back, great! Just make sure it’s strong enough to hold the weight. If not, you can add a wire or use sturdy hooks on both sides for balance. Always check that your puzzle is hanging straight and secure before stepping back.
Think about where you want to hang it. Great places include your living room, hallway, home office, or game room—anywhere people can see and enjoy it. Choose a spot that fits the theme of the puzzle. For example, a colorful puzzle might look great in a fun, casual room, while a peaceful nature scene can be perfect for a calm space.
Try to avoid hanging your puzzle in direct sunlight, as the colors might fade over time. If possible, pick a wall that gets indirect light or use UV-protective glass if sunlight is unavoidable.
With the right spot and a secure setup, your framed puzzle will be a beautiful and lasting decoration you’ll be proud to share!
7. Alternative Methods (No-Glue Options)
If you don’t want to use glue, that’s totally okay! You can still frame your puzzle using no-glue methods that keep your puzzle in one piece without making anything permanent.
One easy option is to use a snug-fit frame—a frame that fits your puzzle so perfectly that it holds everything in place on its own. These frames press gently on the edges of the puzzle to keep it from shifting. Another option is a pressure mount frame, which uses clips or a tight backboard to hold the puzzle firmly without glue.
These glue-free methods have some great benefits:
- You can take the puzzle out and redo it later.
- There’s no mess from glue or waiting for it to dry.
- You don’t risk damaging the puzzle with sticky products.
However, there are a few downsides to consider:
- The puzzle might shift if the frame isn’t tight enough.
- You’ll need a very snug frame to keep it steady.
- It may be harder to move the puzzle without it falling apart.
If you want a non-permanent way to display your puzzle—or if you’re unsure about gluing—these methods are a good choice. Just make sure the frame is tight and sturdy enough to hold everything in place.
8. Tips and Tricks
Framing your puzzle is a fun and rewarding project, and a few simple tips can help make the process even smoother.
If you don’t want to use glue, try using puzzle saver sheets. These are sticky sheets that you place on the back of your puzzle to hold the pieces together. They’re clean, easy to use, and removable if you ever want to take the puzzle apart.
Before you apply any glue, it’s a good idea to take a photo of your completed puzzle. This gives you a reference in case something goes wrong during gluing or framing. You’ll know exactly how the pieces should look.
If it’s your first time framing a puzzle, practice on a smaller puzzle first. This lets you get used to the steps—like gluing, measuring, and framing—without as much pressure.
Lastly, be sure to save any extra pieces you might find or have left over. You can use them for fun decorations, crafts, or as backups in case a piece ever gets damaged.
With these tips, you’ll be better prepared and more confident as you turn your puzzle into a beautiful piece of art!
9. FAQs About Framing Puzzles
Have questions about framing your puzzle? You’re not alone! Here are some common questions and simple answers to help you feel more confident about the process.
Can I unframe and redo the puzzle later?
If you glue your puzzle, it becomes one solid piece, so you won’t be able to take it apart and redo it later. If you want to keep your puzzle reusable, try a no-glue method like using puzzle saver sheets or a snug-fit frame instead.
Is puzzle glue toxic?
Most puzzle glues are non-toxic and safe to use, but it’s always a good idea to check the label to be sure. Use glue in a well-ventilated area and wash your hands afterward just to stay safe.
How long does the glued puzzle last?
A properly glued and framed puzzle can last for many years, especially if it’s kept in a dry place and out of direct sunlight. Using a frame with glass or plastic cover adds extra protection.
Can I use Mod Podge or Elmer’s glue?
Yes, you can use Mod Podge—it works well as puzzle glue and dries clear with a nice finish. Elmer’s glue can also work, but it’s thinner and might need to be mixed with a bit of water. Be sure to test on a small area first to avoid surprises.
Still unsure? Don’t worry—framing puzzles gets easier with practice, and it’s a fun way to enjoy your favorite puzzles for years to come!
Conclusion: Turn Your Puzzle Into Art
Framing your puzzle is a great way to preserve your hard work and turn something fun into something beautiful. After spending hours putting the pieces together, it feels amazing to see the final result hanging proudly on your wall.
Whether it’s a puzzle that made you smile, reminded you of a special memory, or just looked too nice to take apart, framing is a perfect way to keep it forever. With the easy steps you’ve learned—from gluing and choosing a frame to hanging and displaying—you’re now ready to do it yourself.
So go ahead and pick your favorite puzzle, gather your supplies, and start creating your own puzzle art. It’s a fun project that not only shows off your effort but also makes your home more personal and meaningful. You’ll love seeing your puzzle masterpiece every day!