Have you just finished a beautiful puzzle and don’t want to take it apart? Gluing your puzzle is a great way to keep it together, frame it, and turn it into a piece of art. Whether it’s a peaceful landscape, your favorite animal, or a special memory, puzzle glueing helps you save and display your hard work.
Don’t worry if you’ve never done it before—glueing a puzzle is easier than it sounds. With a few simple tools and the right steps, you can do it at home without any stress. It’s a fun and satisfying project that anyone can enjoy.
In this article, you’ll learn everything you need to know to glue your puzzle the right way. We’ll guide you step by step, explain what materials to use, how to avoid common mistakes, and give you helpful tips to make sure your puzzle looks great when it’s done. Let’s get started!
1. Why Glue a Puzzle?
Gluing a puzzle is a great way to keep your hard work together forever. After spending hours putting the pieces in place, you might not want to take it apart. By using puzzle glue, you can make sure your finished puzzle stays in one piece and looks just like the moment you completed it.
Once it’s glued, your puzzle can be turned into a beautiful decoration. You can frame it and hang it on your wall, just like a painting. It’s a fun way to show off your favorite designs, whether it’s a peaceful landscape, a cute animal, or a colorful piece of art.
Your glued puzzle also becomes a special memory. Maybe it was a puzzle you did with friends or family, or one that was especially challenging. Keeping it glued helps you remember the time and effort you put into it.
It also makes a unique and thoughtful gift. If the puzzle has a special theme—like a place someone loves or a picture that means something to them—it can be a meaningful present. Glued puzzles are perfect for showing off limited editions or artwork you don’t want to lose.
Gluing your puzzle turns a simple hobby into something lasting, personal, and full of meaning.
2. What You Need Before You Start
Before you begin gluing your puzzle, it’s important to have everything ready. This will make the process smoother and help you avoid any mess or mistakes.
First, make sure your puzzle is completely finished and lying on a flat, clean surface. You don’t want any bumps or dirt underneath while you’re working.
Next, you’ll need puzzle glue or Mod Podge. These are special types of glue that dry clear and are made to hold puzzles together. Don’t use regular glue, as it can damage the pieces or make them curl.
To spread the glue evenly, get a flat tool like a plastic spatula, a foam brush, or even a clean sponge. This will help you cover the puzzle surface gently and smoothly.
Place a wax paper or plastic sheet underneath your puzzle before you start gluing. This protects your table or surface from glue that might drip through the cracks.
You may also want a ruler or a clean piece of cardboard to help you move or flip your puzzle if needed. It keeps the puzzle from breaking apart.
Finally, here are some optional items that can be helpful:
- Puzzle preserver sheets (if you prefer not to use glue),
- A puzzle roll mat (to build and store your puzzle safely),
- A backing board (to mount your puzzle after gluing),
- And a frame, if you plan to hang your puzzle as wall art.
Having all these things ready will make your glueing project simple and stress-free.
3. Preparing the Puzzle for Gluing
A. Ensure the Puzzle is Fully Completed
Before you start gluing, take a moment to make sure your puzzle is truly finished. Look closely to see if there are any missing pieces or pieces that are in the wrong spot. It’s easy to miss a spot when you’re excited to glue, so take your time and check carefully.
Also, make sure there are no loose pieces. Sometimes, even when a puzzle looks done, a few pieces might not be fully connected.
Once everything is in place, press down gently on the entire puzzle with your hands or a flat object, like a book or piece of cardboard. This helps make sure all the pieces are snug and lying flat. Doing this step will help your puzzle stay smooth and strong when you apply the glue.
Taking a few extra minutes to double-check now will help your glued puzzle look perfect later.
B. Move the Puzzle Carefully (If Needed)
If your puzzle isn’t already on the surface where you want to glue it, you might need to move it. But be very careful—puzzles can fall apart easily if not handled the right way.
To move your puzzle safely, use a piece of cardboard or another firm backing like a baking sheet or foam board. Gently slide the backing under the puzzle, making sure you’re supporting it from underneath.
Don’t try to lift the puzzle without support, or it might bend or break apart. Always slide it gently onto the new surface to keep all the pieces together.
Taking your time with this step will help you avoid having to rebuild the puzzle, and you’ll be ready to glue with confidence.
C. Place a Protective Layer Underneath
Before you start gluing, it’s important to protect your work surface. Puzzle glue can drip through the cracks between the pieces, and you don’t want it sticking to your table.
To avoid any mess, put a sheet of wax paper or plastic under your puzzle. Make sure it’s larger than the puzzle so it covers the area around the edges too. This layer will catch any extra glue and keep your table clean and safe.
Once your protective layer is in place, you can glue your puzzle without worrying about damaging the surface underneath. It’s a simple step that makes a big difference.
4. Choosing the Right Puzzle Glue
Picking the right glue is an important part of keeping your puzzle together and looking great. There are a few good options to choose from, and some types of glue you should avoid.
Types of Glue You Can Use:
- Puzzle-specific glue – This glue is made just for puzzles. It dries clear, holds the pieces firmly, and gives your puzzle a nice finish. It’s one of the best choices for beginners.
- Mod Podge – This is a popular and easy-to-use glue that also works well on puzzles. It spreads smoothly and dries clear. You can find it in most craft stores.
- Homemade glue – Some people mix their own glue using simple ingredients. This might be okay for short-term use, but it’s not the best choice if you want your puzzle to last for years.
Glues to Avoid:
- Regular school glue or white glue – These can be too wet and may cause your puzzle pieces to curl, bend, or warp.
- Spray adhesive – This glue is hard to control and can be very messy. It might not cover the puzzle evenly, and the spray can go everywhere.
Using the right glue helps you protect your puzzle and keep it looking great. Always choose a glue that’s clear, strong, and made for crafts or puzzles.
5. Step-by-Step Instructions for Glueing a Puzzle
Now that your puzzle is ready and you have all your tools, it’s time to start glueing! Just follow these simple steps, and you’ll have a beautiful, finished puzzle to display.
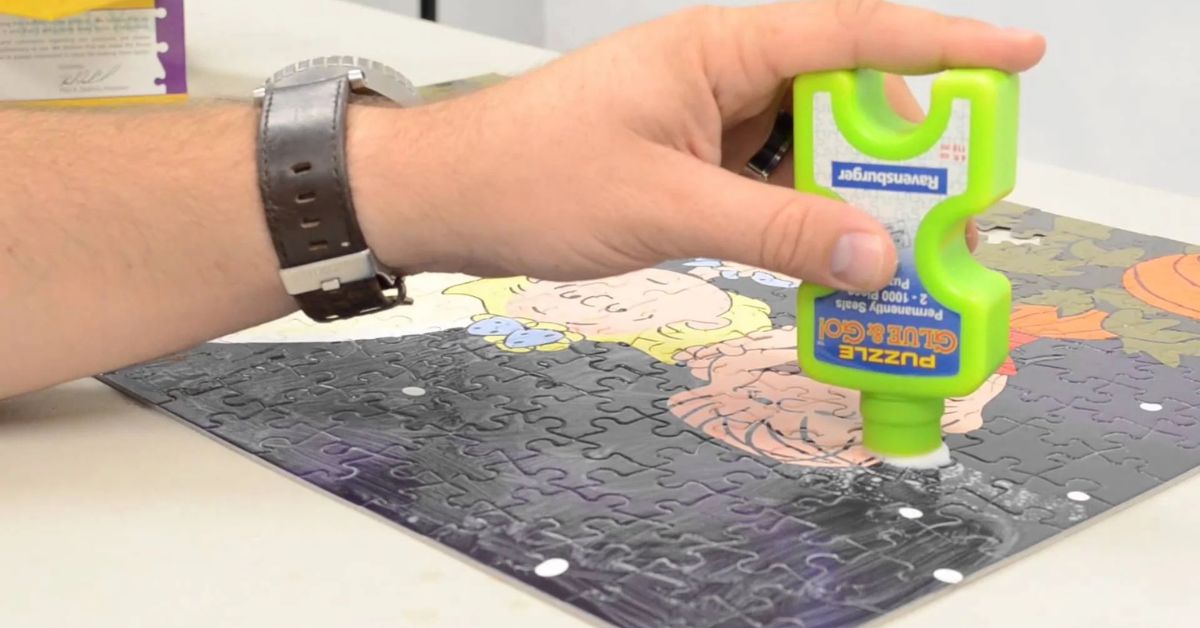
Step 1: Pour the Glue
Start by pouring a small amount of glue directly onto the front of your completed puzzle. You don’t need a lot—just enough to start spreading. It’s better to add more later than to use too much at once.
Step 2: Spread the Glue Evenly
Use a spatula, foam brush, or sponge to gently spread the glue over the surface of your puzzle. Make sure to cover every piece, especially the seams between the pieces, so the puzzle holds together well.
Try to spread the glue in thin, even layers to avoid puddles or lumps. Go slowly and take your time.
Step 3: Let It Dry
Once the glue is spread, let your puzzle dry for at least 2 to 4 hours, or follow the drying time on the glue bottle. It’s very important that you don’t touch or move the puzzle while it’s drying, or you might ruin the finish or loosen the pieces.
Step 4: Apply a Second Coat (Optional)
If you want your puzzle to be extra strong or have a shiny, glossy finish, you can apply a second thin coat of glue. Just repeat the same process, then let it dry completely again.
That’s it! Your puzzle is now glued and ready for the next step—backing or framing. Taking your time with each step helps make sure your puzzle turns out smooth, strong, and beautiful.
6. Gluing the Back of the Puzzle (Optional)
If you want your puzzle to be extra strong and long-lasting, you can also glue the back. This step is optional, but it adds more support and helps the puzzle stay flat over time.
First, make sure the front of your puzzle is completely dry. Then, to flip it safely, use the cardboard sandwich method:
- Slide a piece of cardboard underneath your puzzle.
- Place another piece of cardboard gently on top.
- Hold the two pieces together and carefully flip the puzzle over.
Once the back is facing up, apply a thin layer of glue across the surface. You can use the same tool you used before—a spatula, foam brush, or sponge—to spread it evenly.
Now, just let it dry completely. This may take a few hours, so make sure it’s in a safe spot where no one will bump it.
Gluing the back gives your puzzle extra durability and helps it stay solid, especially if you’re planning to hang or move it often.
7. What to Do After the Puzzle is Glued
Once your puzzle is completely dry and firmly glued, it’s time to get it ready for display. There are a couple of easy and fun things you can do to finish the project.
A. Add a Backing
To make your puzzle more stable, it’s a good idea to add a backing. This will help keep it from bending or breaking when you move it.
- Use a foam board or a sturdy piece of cardboard that’s big enough to cover the back of your puzzle.
- Cut the board to match the size of your puzzle so it fits perfectly.
- Then, attach the puzzle to the board using a strong glue or double-sided tape. Press it down gently and let it dry if you’re using glue.
With a backing in place, your puzzle will be easier to handle and ready for framing or display.
B. Frame Your Puzzle (Optional)
If you want to hang your puzzle on the wall, framing it is the perfect way to do it.
- Buy a frame that matches your puzzle’s size. You can find puzzle frames at craft stores or online.
- Carefully place the puzzle into the frame, just like you would with a picture or painting.
- Once it’s framed, you can hang it on your wall or set it on a shelf to show off your hard work.
Framing your puzzle turns it into a piece of art you can enjoy every day!
8. Tips and Common Mistakes to Avoid
Gluing a puzzle is easy, but a few smart tips can help you get the best results. Here are some simple things to keep in mind—and some common mistakes you’ll want to avoid.
- Don’t use too much glue. A little goes a long way. Using too much can cause the puzzle to bubble, warp, or look messy. Spread the glue in thin, even layers.
- Always protect the surface underneath. Place wax paper or plastic under your puzzle before gluing. This keeps your table safe from drips or sticky spots.
- Work in a well-lit, clean area. Make sure you’re in a room with good light so you can see where the glue is going. Try to avoid areas with dust or pet hair, which can stick to the glue.
- Let each coat dry completely before touching. It’s important to be patient. If you touch the puzzle too soon, the glue might smear or pull pieces apart.
- Take a photo before gluing. Just in case something goes wrong, a photo will help you remember how the puzzle looked. It can be helpful for fixing mistakes or rebuilding, if needed.
By following these simple tips and avoiding common mistakes, you’ll have a smooth, clean, and lasting puzzle you’ll be proud to show off.
9. FAQs About Glueing Puzzles
If you’re new to glueing puzzles, you might have some questions. Here are a few common ones, along with simple answers to help you feel confident before you start.
Can I take the puzzle apart after gluing?
No. Once you glue a puzzle, it becomes permanent. The pieces stick together, and you won’t be able to take it apart to rebuild it later.
Is puzzle glue safe?
Yes. Most puzzle glues are non-toxic and safe to use at home. Just make sure to follow the instructions on the bottle and wash your hands afterward.
What if I make a mistake?
If you see small bubbles or uneven spots, you can gently smooth them out while the glue is still wet. But if the puzzle gets damaged or doesn’t look right, you may need to start over with a new one. That’s why it’s a good idea to take a photo before gluing.
Can I use puzzle preserver sheets instead?
Yes. Puzzle preserver sheets are a great glue-free alternative. They’re sticky sheets you press onto the back of the puzzle to hold the pieces together without any mess.
These FAQs cover the basics, so you can start glueing your puzzle with peace of mind and enjoy the process from start to finish.
Final Thoughts
Gluing a puzzle is a fun and rewarding way to save your hard work. Instead of taking it apart and putting it back in the box, you can turn your finished puzzle into something you can enjoy every day.
It’s a simple process that turns a fun project into a beautiful piece of décor for your home. Whether you want to hang it on your wall or give it as a gift, glueing helps your puzzle last for years.
With just a few basic tools and a little patience, anyone can do it—even if it’s your first time.
So next time you complete a puzzle you love, don’t take it apart—try glueing it instead!